

Builder gel is one of the most versatile nail enhancements that professionals and at-home nail artists use. Offering strength, durability, and a natural finish, builder gel has become a go-to in the nail industry.
There’s plenty to know about using builder gel for nail extensions to achieve remarkable results. Keep reading as we explore its benefits and applications on how to create flawless nail extensions at home or in the salon!
Why Use Builder Gel?
Builder gel has become a go-to product for nail enthusiasts and professionals alike, thanks to its versatility and numerous benefits. But why? Here are some of the key reasons why builder gel stands out as a must-have in nail care and design:
- Builder gel offers a long-lasting manicure that can handle daily wear and tear. Its thicker consistency provides more protection than traditional gel polishes.
- With a thin application, builder gel mimics the appearance of natural nails with a polished finish.
- Builder gel is perfect for creating extensions, repairing damaged nails, or enhancing natural nails.
- Customize builder gel by pairing it with tips, gel polishes, and various enhancements.
How Builder Gel Differs From Acrylic Nails
While acrylic nails create a robust manicure, builder gel offers more flexibility. This makes it less prone to cracking, giving it an edge for clients with active lifestyles. Unlike acrylics, builder gel hardens only when cured under a UV or LED lamp, allowing for more precise control during application.
Six Steps To Apply Builder Gel for Stunning Nail Extensions
Achieving salon-quality builder gel nails at home is easier than you might think, as long as you follow the right techniques. Builder gels are versatile, strong, and perfect for creating flawless extensions or overlays.
Step 1: Prepare the Nails
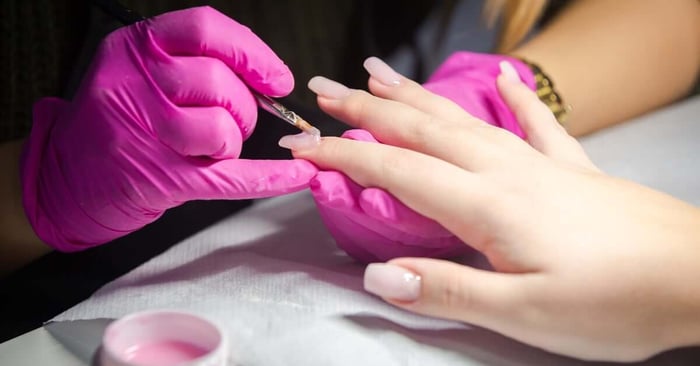
Preparation ensures proper adhesion and longevity of the builder gel. Start by washing your hands to remove dirt and oil. Gently push back cuticles with a pusher and trim excess if needed.
Lightly buff the nail surface with a fine-grit buffer for a better grip. Wipe nails with a lint-free wipe and nail cleanser or isopropyl alcohol to eliminate oils, dust, or debris. This creates a clean base for your manicure to prevent lifting.
Step 2: Apply Primer or Base Gel
Some builder gel systems need a primer or base coat for optimal adhesion. Check your builder gel instructions to see if this step is necessary.
If so, apply a thin coat of primer or base gel to your nails, avoiding flooding the cuticles. Cure under a UV or LED lamp for the product’s recommended time, usually between 30 and 60 seconds, to create a strong bond between your natural nail and the builder gel.
Step 3: Apply the Builder Gel
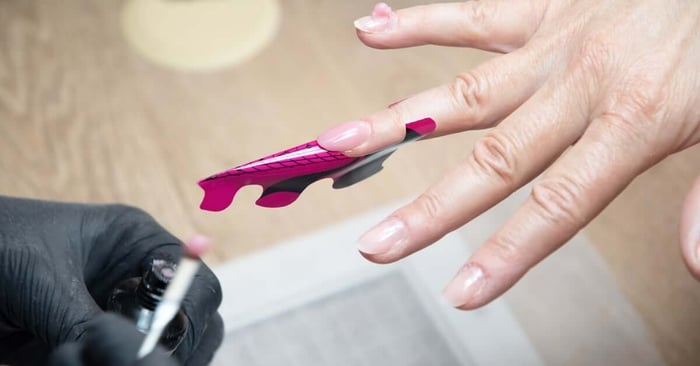
Now it’s time to apply the builder gel itself. Apply a thin, even layer of the gel on your nail. If extending nail length, securely attach nail tips or forms before use. Let the builder gel self-level for an even base.
You can cure the nail under a UV or LED lamp for 30-60 seconds, depending on the lamp’s power and gel instructions. Ensure the gel is fully cured before proceeding.
Step 4: Build Structure and Strength
For longer nails or extensions, you’ll need to add more support to ensure durability and create a natural-looking arch. Apply a second layer of builder gel on the stress point (center of the nail) to form the apex.
Use a small brush to distribute the gel evenly and maintain smoothness. Cure each layer before applying the next. You can add multiple layers to achieve the desired thickness or strength. This step makes your nails beautiful, strong, and long-lasting.
Step 5: Shape and Buff the Nails
After curing the final layer of a builder gel, your nails will have a tacky surface. Wipe off the sticky layer with a lint-free wipe and isopropyl alcohol.
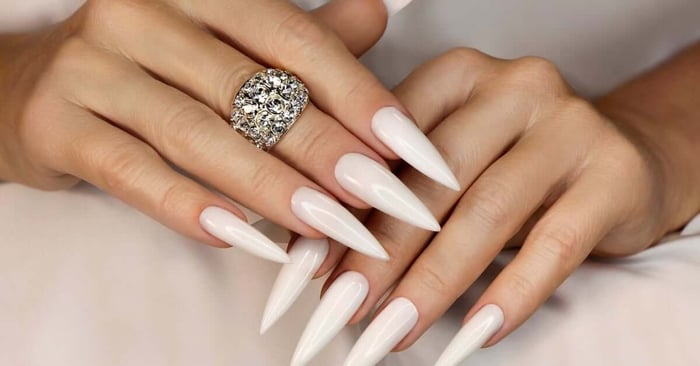
Then, use a nail file to shape your nails to your desired square, oval, almond, or stiletto shape. Smooth out bumps or uneven areas with a nail buffer for a polished finish. A smoother surface enhances the appearance of your top coat or gel polish.
Step 6: Apply a Top Coat or Gel Polish
To seal and finish your manicure, apply a high shine top coat. If you’d like to add color, now is the time to layer on gel nail polish before sealing with the top coat. Apply the polish in thin, even layers, curing each one under the lamp for the recommended time. After curing the top coat, your nails will have a glossy, durable finish ready to withstand everyday activities.
Common Challenges When Working With Builder Gel
Working with builder gel can be a game-changer for creating long-lasting and professional-looking nails, but it’s not without its challenges. Below are some helpful tips to address these challenges and improve your builder gel application skills.
Lifting and Peeling
One common issue is the lifting or peeling of the builder gel, which can occur due to improper nail prep or application. Make sure the natural nails are completely clean, dry, and free of oils before starting. You can use a dehydrator and primer to ensure better adhesion.
Bulking or Uneven Texture
If the builder gel appears too bulky or uneven, it may be due to applying too much product at once. Work with thin layers and allow each layer to self-level before curing. You can also use a detail brush to fine-tune the application and smooth out any excess.
Difficulty in Removal
Removing builder gel can be tricky if not done correctly. Avoid peeling or forcing the gel off, as this can damage the natural nails. Instead, soak the nails in acetone or use foil wraps to break down the product gently. Patience is key during this process for preserving nail health.
Create Stunning Nails Today
Before working on your own or a client’s nails, it’s essential to understand the basics of using builder gel for nail extensions. Mastering this first step is the key to creating durable, beautiful nail enhancements that stand the test of time. Whether you’re extending length, creating overlays, or pairing it with gel nail polishes, builder gel provides endless opportunities for the perfect manicure.
Try Mia Secret’s collection of professional-grade builder gel products to boost your nail design. Visit our online store today and experience innovative formulas trusted by experts worldwide.