
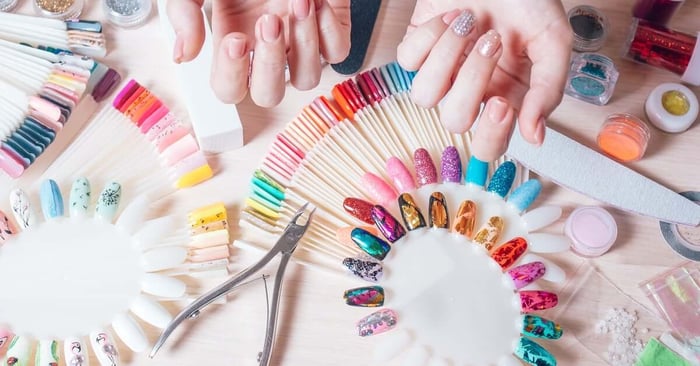
Taking your nail art skills to the next level requires practice, creativity, and the right techniques. Gel nails offer endless design possibilities, flawless finishes, and durability, making them an ideal choice for those seeking to elevate their artistry.
Keep reading to explore advanced gel nail art techniques for professionals, and get tips to wow your clients and elevate your craft. From intricate details to artistic layering, there are plenty of ways to enhance your expertise and keep your clients coming back for more. Whether you’re looking to create bold statement nails or delicate minimalist art, precision and practice will bring each technique to life.
Negative Space Designs
Negative space nail art has become a favorite among both clients and nail artists for its clean, contemporary look. This technique involves leaving parts of the natural nail exposed, creating a contrast between the gel colors or designs and the bare nail.
Here’s how to achieve this effect:
- Use striping tape to define clean lines and geometric shapes.
- Apply gel polish in bold or neutral tones, ensuring precise application around the tape.
- Cure each layer as needed, then gently remove the tape to reveal polished lines of negative space.
Negative space designs are highly adaptable, allowing for endless creativity. Plus, they work well with both minimalist patterns and bold details, such as metallic or neon accents.
Marble Effects With Gel
Marble nail art is timeless, elegant, and surprisingly versatile. Using gel-based techniques, you can recreate the luxurious appearance of marble on nails. While this may look difficult, it’s straightforward with the right technique.
Here’s how:
- Apply a base layer of white or a light color, and cure.
- Mix a darker gel shade with a small amount of clear gel to create a translucent texture.
- With a fine-detail brush, swirl the darker gel onto the nail in irregular patterns. For an enhanced marble effect, use a tiny drop of acetone on the brush to diffuse the edges of the lines.
- Cure once satisfied, and finish with a top coat for a high-gloss sheen.
This technique allows for endless creativity, with opportunities to experiment using muted tones or bolder, contrasting shades for a striking effect.
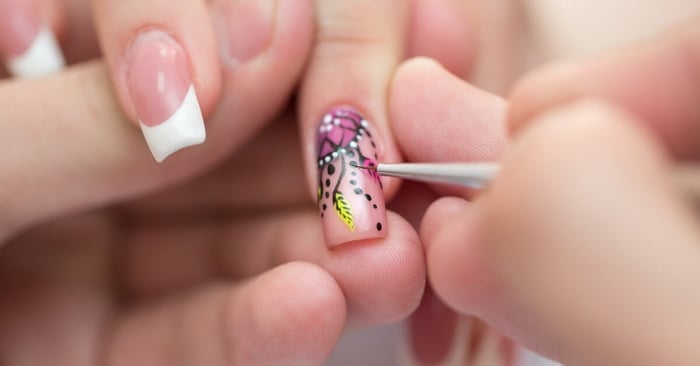
3D Gel Nail Art
Bring your designs to life by using sculpting gels to create 3D elements. Professional nail artists impress their clients with stunning three-dimensional flowers, bows, or abstract shapes, adding depth and dimension to their designs.
Here are the steps to get it right:
- Choose a thicker sculpting gel, and pre-cure as you build up the structure of the design.
- Use silicone tools or fine brushes to mold and define details like petals or curves.
- Layer additional gel if needed to add volume, curing between steps to maintain the integrity of the structure.
- Add finishing touches like glitter, chrome powder, or subtle hand-painted accents to complete the look.
3D gel designs require steady hands and precision, but they will result in showstopping nails perfect for special occasions or statement styles.
Gradient or Ombré Gel Nails
Ombré is a gradient effect that blends two or more colors seamlessly for a soft, elegant finish. This technique remains a favorite for its chic and versatile appeal. Gel polish ensures a smooth transition of colors while offering durability.
Here’s the process:
- Start by applying the lightest color first, letting it cure before layering.
- Using a small sponge or an ombré brush, gently dab the second color over the first, focusing on the transition at the middle point of the nail.
- Blend the colors carefully, taking your time to avoid streaks. Some blending brushes can help smooth out imperfections.
- Cure the blended layer, apply another coat if needed, and seal everything with a glossy or matte top coat.
Ombré nails work beautifully with soft pastels, bold hues, or metallic shades, making them a client favorite for any season or occasion.
Layering With Gel Stamping
Nail stamping has been revolutionized by gel techniques, allowing professionals to include intricate patterns with greater precision and durability. More advanced than conventional stamping, this technique involves layering different designs to create complex visual effects.
Use these tips to incorporate stamping into your work:
- Select a base layer color, and cure it fully.
- Choose stamping plates with varying designs. Start with larger, more abstract stamps as a background, and cure.
- Add foreground designs, such as flowers or geometric shapes, over the first layer, ensuring proper curing between layers.
- Use clear stamping gel polish for precise placement, and finish with a top coat to seal the design.
The result? Multidimensional nail art that leaves your clients impressed every time.
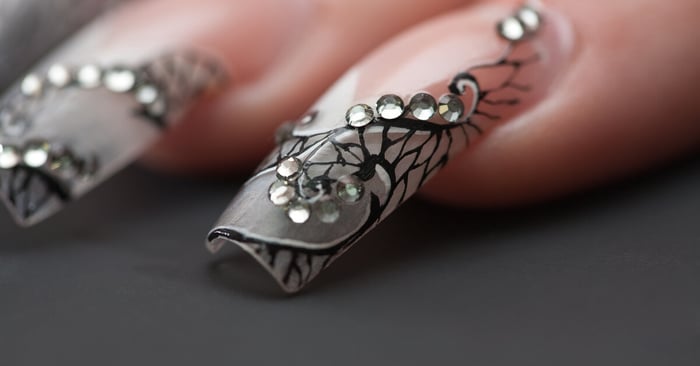
Abstract Foiling
Foil accents can take any design from simple to sophisticated. Gold, silver, or holographic foils pair beautifully with gel nails, adding flashes of luster that catch the light.
Try this method for best results:
- After applying your base color and curing, select a transfer foil that complements the design.
- Apply a thin layer of foil transfer adhesive to the nail in the areas where you’d like the foil to adhere.
- Once tacky, place the foil over the adhesive, and gently press down. Then, peel back to reveal the metallic transfer.
- Seal everything with a strong gel top coat for durability.
Abstract foil accents pair well with negative space and minimalist vibes or can be spread across all fingers for a bolder statement.
Chromatic Mirror Effects
For ultra-luxe, futuristic nails, chrome powders provide an impeccable mirror effect. This high-shine finish is always a hit with clients seeking nails that truly stand out.
Execution involves the following:
- Use a black gel base coat, which enhances the reflective quality of chrome powders.
- After curing the base, gently rub a fine layer of chrome or holographic powder over the nail using an applicator tool or a silicone brush.
- Seal the design with a no-wipe top coat to maintain the reflective finish and protect the look.
With hundreds of chrome powder shades on the market, you can cater to diverse preferences, from polished metallics to bold rainbow effects.
Unlock Your Greatest Potential
Now that you have these advanced gel nail art techniques for professionals in your back pocket, you can create unique, memorable work. When paired with a gel nail acrylic kit, these methods enable precision, efficiency, and high-quality results, keeping your clients satisfied and your artistry in high demand.
Elevate your designs and showcase your skills by using high-quality nail products. Browse Mia Secret’s professional collection today, and take your nail art to the next level. If you have any questions, be sure to reach out to our team, or check out our blog for more nail-related tips and tricks.