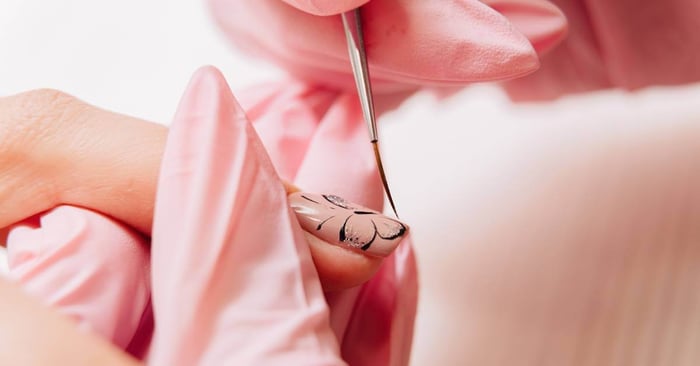
Offering nail art services in your salon allows you to tap into a growing trend and provide your clients with unique and personalized designs. However, achieving intricate nail art designs requires proper tools, specifically nail art brushes. This quick guide to understanding nail art brushes details the common options, their purposes, and tips for proper maintenance.
Types of Nail Art Brushes
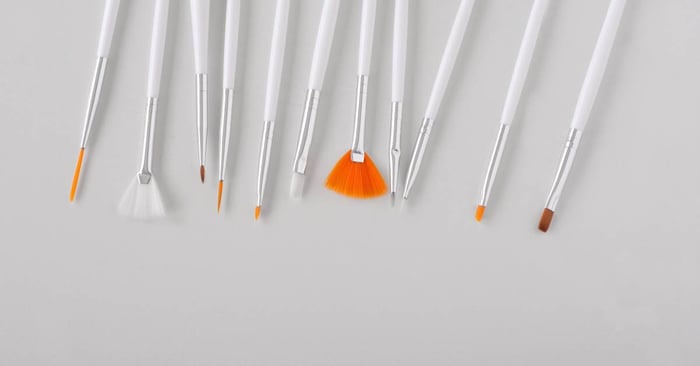
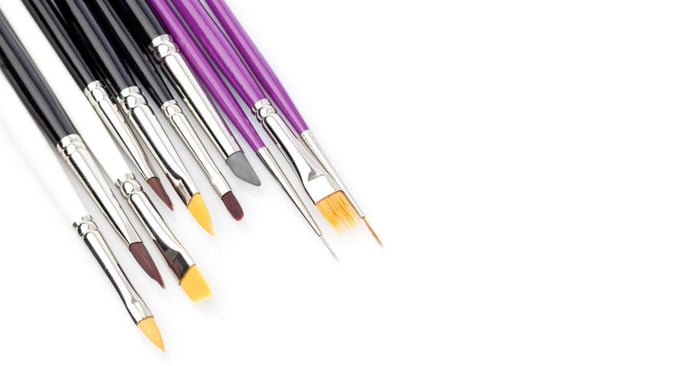
There are several types of nail art brushes that you can use for different techniques and designs, each with a unique shape and purpose. Nine types of brushes and their uses include:
- Angled flat brushes
- Round brushes
- Fan brushes
- Dotting brushes
- Detail brushes
- Pointed brushes
- Acrylic brushes
- Gel brushes
- Clean-up brushes
Below, we’ve gone into more detail on each of these brushes to help you determine the type to buy for your salon.
Angled Flat Brush
The angled flat brush is best for creating angles, French Tips, or one-stroke designs. It’s also particularly useful for painting on swoops and curves, giving your nail art a dynamic and fluid appearance.
Round Brush
The round brush is your go-to tool if you enjoy painting flower petal designs or polka dots. The rounded head and soft bristles allow for a smooth polish application, making it perfect for creating circular designs and intricate details.
Fan Brush
The fan brush can create soft, feathered effects and blend colors seamlessly. Its wide, fanned-out bristles distribute polish evenly, making it perfect for gradient designs and ombré effects. This brush is also ideal for adding subtle glitter accents and enhancing your designs with sparkle.
Dotting Brush
Creating uniform dots can be challenging without the right tool, but the dotting brush makes it easy. This brush features a rounded tip that deposits small amounts of polish precisely where you want them. It’s perfect for creating polka dots, flower centers, and other designs that require consistent, round shapes.
Detail Brush

The detail brush is essential for creating shapes and small details on the nail. Due to its thin, elongated bristles, you can easily control it as you create numerous types of designs. Whether you’re painting tiny flowers or complex lace patterns, the detail brush ensures that every stroke is exact and beautiful.
Pointed Brush
The pointed brush is essential for detailed work and creating graceful curves, but you can also use it to paint stripes or petals. Its tapered tip allows for controlled application, making it perfect for intricate swirling patterns and elegant flourishes.
Acrylic Brush
Applying acrylic powder and liquid requires a specialized tool, such as an acrylic brush. The brush’s sturdy bristles can handle the thick consistency of acrylic products, such as acrylic powder, allowing for easy shaping and sculpting.
Pro Tip
Mia Secret sells everything you need for the perfect manicure and pedicure, including colored acrylic powder sets. Shop our options to find the ideal shades for your salon.
Gel Brush
A gel brush is essential if you use gel polish in your salon, as it can handle the ticker consistency of this polish. Keep your gel brushes in a separate area from acrylic and standard nail art brushes so that you don’t mix them up.
Clean-Up Brush
Mistakes happen, but you don’t have to start over if you have a clean-up brush on hand. This thin brush is perfect for removing excess polish or correcting small errors in your design. You can also use it to create negative space designs by carefully wiping away polish in specific areas.
How To Choose the Right Nail Art Brush
This guide to understanding nail art brushes wouldn’t be complete without some tips on choosing the right brush for your needs. Selecting the right brush ensures you have control and precision in your designs, making the process much more manageable. Consider these factors when choosing a nail art brush.
Bristle Type
The type of bristles on a brush determines its stiffness and flexibility. For fine lines and intricate patterns, look for brushes with soft, thin bristles. On the other hand, you may need a stiff bristle brush to create bolder lines and fill in larger areas of the nail.
Brush Shape
As mentioned earlier, different brushes have unique shapes that serve specific purposes. Consider the types of designs you want to create and choose your brush accordingly. While a detail brush allows you to create intricate art on the nail, a dotting brush is perfect for polka dots.
Brush Size
Most nail brushes come in various sizes, labeled in numbers or measurements. A smaller brush does not mean less quality or that the handle is shorter than a “large” brush. The “size” depends on the number of bristles a brush has; smaller sizes, such as a 2, have fewer bristles and are best for intricate designs.
Shop for Quality
To ensure quality, buy brushes from reputable brands and suppliers. Low-quality brushes can shed, leading to a messy design and making it challenging to achieve precision in your work. This impacts the design and can affect your salon’s reputation.
Tips for Maintaining Your Nail Art Brushes

Properly maintaining your nail art brushes is crucial to keep them in excellent condition. Care for your brushes by doing the following.
Clean Your Brushes
Regular cleaning prevents the buildup of polish and other materials that can affect the brush’s performance. Use a gentle brush cleaner or soapy water to clean the bristles thoroughly. Avoid using acetone or harsh chemicals, as they can damage the bristles. After washing, reshape the bristles and allow them to dry flat on a clean surface.
Moreover, you should periodically condition your brushes to keep the bristles soft and maintain their shape.
Pro Tip
Mia Secret’s brush cleaner easily cleans and sanitizes brushes without harsh chemicals, prolonging their lifespan and ensuring hygienic use.
Properly Store Your Brushes
Proper storage prevents damage and keeps your brushes in good shape. Store your brushes in a container or brush holder with the bristles facing up to avoid bending or misshaping them. If you’re traveling with your brushes, you can also use a protective cap.
Replace Old Brushes
All good things must end, and this also applies to nail art brushes. If you notice that a brush’s bristles are frayed or misshapen despite proper care, it’s time to replace them. Using old, worn-out brushes will make your designs look messy and affect the quality of your work.
By knowing which nail art brushes to use and how to care for them, you can elevate your nail art game and offer your clients a wide range of designs. Practice with different brushes to find which ones work best for you, and have fun exploring new techniques and styles!

