

You've mastered the basics of applying acrylics at home, but now you're wondering if you’re using the right monomer. Learning how to choose the best monomer for your nail needs can feel overwhelming when you're just getting into the DIY nail game.
The truth is, not all monomers work the same way, and choosing the right one affects everything from how your nails look to how long they last. This guide breaks down what you actually need to know about monomers so that you can pick the right bottle for your specific situation.
What's Really Happening When You Mix Monomer and Powder
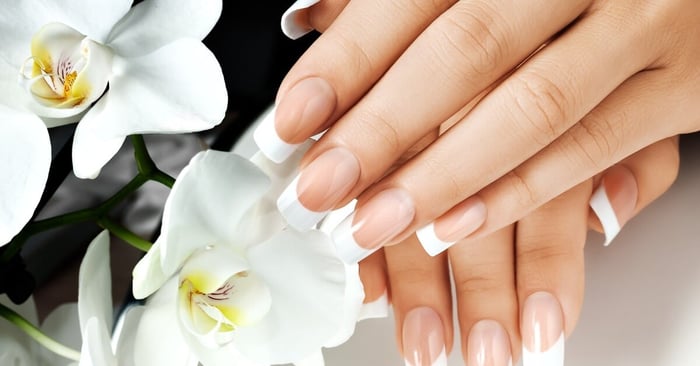
Monomer is the liquid half of your acrylic system, and it reacts with the polymer powder to create the hard, durable nail enhancement you're after. When you dip your brush into the monomer and then into powder, a chemical reaction called polymerization begins immediately. This reaction transforms the liquid and powder into a workable bead that you can shape and sculpt on the nail before it hardens completely.
The quality of your monomer directly impacts how smoothly this process goes and how your finished nails perform over time. A good monomer creates a strong bond to the natural nail, resisting lifting and cracking, and produces a finish that looks smooth rather than lumpy or cloudy.
Different monomers contain additives that alter their behavior during application and curing. Some include UV inhibitors to prevent yellowing in sunlight, while others contain strengthening agents that add flexibility to prevent breakage.
The consistency of the monomer affects how easily it mixes with powder and how the bead flows across the nail surface. When you’re looking for monomer, the first step is to use the one that matches the powder system you’re working with. Monomers and powders from the same company are designed and tested to work together. When you mix and match products for acrylic nails from different brands, you run the risk of product breakdown.
Scented vs. Unscented Formulas
The smell of traditional monomers is famously harsh, and it comes from chemicals called methacrylic acid esters, which produce those strong odors. Unscented monomers still contain these compounds, so calling them "unscented" is a bit misleading. They're really just less harsh than older formulas.
Manufacturers have refined these products to reduce odor intensity, but you'll still catch a chemical smell when you open the bottle. If you're working in a small space with poor airflow, even low-odor formulas can become noticeable after a while.
Scented monomers take a different approach by adding fragrances that mask the chemical smell with notes of vanilla, strawberry, lavender, or other pleasant scents. Some people love this option because it makes the application process more enjoyable and less nose-wrinkling.
The fragrance doesn't change how the monomer performs chemically. It’s purely about the sensory experience. You should consider your working environment when deciding between these options.
Fast-Setting vs. Slow-Setting: Matching Speed to Your Skills
The setting speed of your monomer determines your working time—essentially, how long you have to shape and perfect each bead before it hardens. Fast-setting monomers cure quickly, which experienced nail techs appreciate because they can move through applications efficiently.
For beginners, though, fast-setting formulas create pressure and stress. You'll find yourself rushing to smooth out bumps and blend edges before the acrylic sets, and this often leads to mistakes and frustration. When you're still building muscle memory for brush control and product placement, that extra time pressure doesn't help.
Slow-setting monomers give you room to work at your own pace and adjust as you go. You can take time to perfect your bead placement, smooth out any texture issues, and create clean edges around the cuticle and sidewalls without the product setting up before you’re finished. This extended working time comes from modified formulas that slow down the polymerization reaction, giving you those extra precious seconds or minutes.
The downside is that your total application time increases because you're waiting longer for each layer to cure before moving to the next step. Your skill level should guide this decision more than anything else.
Considering Your Working Environment and Setup
Your physical space influences which monomer works best for your needs, and this factor often gets overlooked by beginners. Temperature affects how the monomer behaves. Warmer rooms speed up the curing process while cooler spaces slow it down. If you're doing nails in a naturally warm room or during summer months, you might find that slow-setting formulas cure faster than expected.
Conversely, working in a cool basement or during winter might extend your working time beyond what the bottle suggests. Ventilation is even more critical to consider because monomer fumes can accumulate in enclosed spaces regardless of whether you choose scented or unscented formulas.
Setting up near an open window, using a small fan, or working in a well-ventilated room prevents that lingering chemical smell from taking over your space.
Some people invest in small nail station ventilation systems, which is worth considering if you do nails frequently. Lighting conditions matter, too. You need good visibility to spot imperfections and ensure smooth application. Natural daylight works well, but a high-quality LED lamp designed for nail work provides consistent lighting regardless of the time of day.
Think about how often you'll do nails and whether you have a dedicated space or need to set up and pack away each time. Frequent users benefit from investing in better ventilation and lighting, while occasional hobbyists can make do with simpler setups if they prioritize proper airflow.
Making Your Final Selection: Practical Tips

If walking into a beauty supply store or browsing online still feels intimidating even after you understand the basics of monomer selection, start by honestly assessing your current skill level rather than buying based on your aspirations.
Beginners gain more from slow-setting, low-odor formulas that forgive mistakes and create a comfortable working environment. You can always upgrade to faster or different formulas as your abilities improve.
Reading reviews from other DIY nail enthusiasts helps you understand real-world performance beyond marketing claims. Pay attention to comments about working time and odor levels, and don‘t mix your monomer with different powder brands.
Consider buying smaller bottles initially to test formulas before committing to larger sizes. This approach lets you experiment with scented versus unscented, or with different setting speeds, without wasting money on products that don't match your needs. Here's what to evaluate when testing a new monomer:
- How quickly does the bead form when you mix the liquid and powder.
- Whether the consistency stays workable long enough for your application speed.
- How the finished nails look after curing.
- Any yellowing or discoloration that develops over time.
Remember that learning how to choose the best monomer for your nail needs evolves as you gain experience and your technique improves. The monomer that works perfectly for your best friend might frustrate you, or vice versa. Your ideal monomer supports your current abilities while helping you create nail sets you feel proud to show off.