
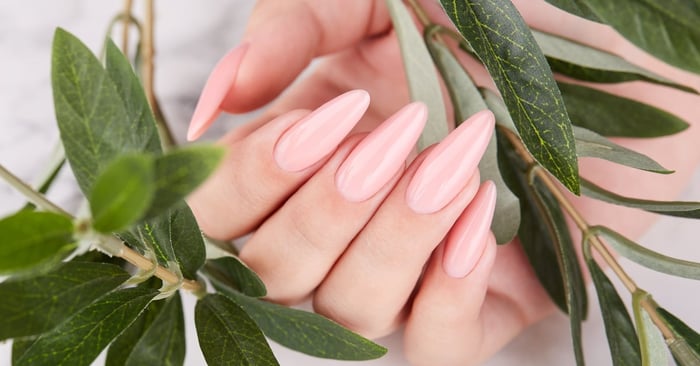
Shaping acrylic nails is the step that takes a set from basic to flawless. Whether you’re aiming for sharp stilettos, elegant almond shapes, or classic squares, perfect shaping requires technique, patience, and attention to detail.
By following 10 tips for perfectly shaping acrylic nails after application, you’ll feel confident achieving salon-level results at home or enhancing the satisfaction of your clients in the salon. Let’s talk all things shaping to transform those acrylic nails into a chic, polished finish.
1. Prep and Set the Foundation
Every great shape begins with a solid base. Before shaping, ensure your acrylic application is even, with proper thickness and a smooth overlay. Any bumps, ridges, or uneven areas will interfere with the shaping process.
Using high-quality acrylic nail supplies, such as precision brushes and durable powders, ensures a smoother application and sets you up for success when it’s time to file.
2. Choose Your Shape Ahead of Time
Deciding on the shape beforehand is critical. Consider the natural nail’s strength, length, and health, as these factors affect durability.
Shapes like square or squoval provide a sturdy option for everyday wear, while coffin and almond shapes work for longer lengths. By deciding prior to filing, you’ll avoid costly mistakes or inconsistent results.
3. Use the Right Tools
Tools make all the difference. Invest in professional-grade files with appropriate grits for shaping acrylic nails. A coarse 100-grit file is excellent for removing bulk, while a finer 180-grit file refines edges.
For detailed precision, an electric nail drill comes in handy, especially around the cuticle area or to even out the underside of the nail. High-quality supplies like those from industry-trusted brands are worth it for better control and longevity.
4. File in One Direction
To create smooth, clean edges when working with acrylic, always file in one direction instead of sawing back and forth. Sawing can cause frayed or uneven edges, making the finished product look less polished, and it puts unnecessary stress on the acrylic structure, which could lead to cracks or weak points over time.
By using a consistent filing motion, you achieve a neater, more cohesive shape and preserve the material’s structural integrity, ensuring a more professional and durable result.
5. Watch the Angle
When shaping nails, the angle of your file plays a key role in determining the overall appearance and symmetry of the nail. Flattened angles are best for creating sharp, square edges, giving the nail a clean and modern look. On the other hand, soft, curved angles are perfect for achieving round and oval shapes, which offer a more natural and classic aesthetic.
As you work, continuously check your angles to ensure precision and consistency, and make sure to hold the hand steady to avoid over-filing or creating uneven shapes. Taking your time and paying attention to detail will result in beautifully shaped nails every time.
6. Focus on Symmetry
Symmetry is key to keeping the nails looking balanced, polished, and professional. To ensure consistency, regularly compare the nails on both hands, paying close attention to their shape and length. If one edge appears shorter, more angled, or uneven compared to its counterpart, make gradual adjustments to correct it without over-filing.
Working in a well-lit area with a clear and organized workspace can help you spot symmetry issues early and address them with precision. Taking your time and focusing on these details will result in a more even and flawless finish.
[IMAGE B]
7. Refine the Apex and Sides
The apex, which is the highest point of the nail, plays a crucial role in achieving both a visually pleasing appearance and lasting durability. A well-formed apex ensures the nail has the strength to withstand daily wear and tear while also enhancing its aesthetic appeal. Make sure the apex is slightly raised and smoothly transitions into the rest of the nail for seamless results, particularly for popular shapes like almond and coffin.
Skipping this step can lead to uneven or unnatural-looking edges, which can detract from the overall look and functionality of the nail. Taking the time to perfect these details will elevate your nail work to the next level.
8. Blend With a Buffer
Once the shaping process feels complete, take the time to go over each nail with a buffer to remove any harsh edges and smooth out the surface. Acrylic nails naturally develop tiny ridges during the shaping process, and buffing helps to eliminate these, resulting in a glossy, uniform look.
For the best results, use a high-quality buffer and work gently across each nail to avoid over-buffing. To finish, pair your buffing with a professional-grade finish coat to achieve the ultimate salon-quality shine. This extra step will leave your nails looking polished, sleek, and ready to impress.
9. Clean Up As You Go
Dust and debris can settle into the edges of the nails as you work, making it harder to double-check your progress and see the true shape. To avoid this, keep a soft nail brush or a lint-free towel nearby to clean the nails regularly during shaping.
Gently brushing or wiping away the dust ensures you have a clear view of your work, allowing you to evaluate your progress in real time. This simple step helps you make precise adjustments and achieve a polished, professional look.
10. Finish With Confidence
Finally, ensure the acrylic’s structure supports the chosen shape without being too thin or prone to breakage. Apply any final touches like top coats or additional enhancements. Patience and quality supplies are your best friends at this stage, ensuring a sturdy, longer-lasting manicure.
Perfectly shaping acrylic nails after application takes practice, sharp attention to detail, and the right products. Whether you’re new to acrylic enhancements or aiming to streamline your salon techniques, following these tips will dramatically improve your results. And don’t forget that having premium acrylic nail supplies is essential to support your efforts throughout the process.
Are you ready to level up your nail game? Stock up on professional-grade acrylic nail tools and products to get beautifully crafted results every time. Check out our selection today and see the difference premium supplies can make!