

Creating flawless nail extensions requires more than just gluing on tips and calling it done. The secret to adding length with nail tips is to make your extensions look completely natural. Whether you’re a seasoned nail professional or a passionate DIY enthusiast, finessing this technique will elevate your nail game.
Let’s dive in with our top tips for blending adding length with nail tips seamlessly and transforming your short natural nails into long, beautiful extensions.
Understanding Nail Tip Basics
Nail tips are an easier and quicker way to create extensions without sculpting, but choosing the right ones makes all the difference. Quality professional nail kits offer tips in various shapes, sizes and even colors. White tips work wonderfully for classic French looks, while clear tips offer versatility for all types of designs. Full-well tips are great for nail biters or those who need a little more support, while well-less tips are generally the quickest and easiest to apply because they don’t require any blending.
Sizing is crucial when you want the most natural and long-lasting results. Each nail tip should cover your nail plate from one sidewall to the other without overlapping onto the skin. Likewise, you want to make sure that the tip isn’t too small that it doesn’t cover the entire width of your nail. Test different sizes to find the perfect fit. Look for tips that match the natural C-curve of your nails for the most comfortable fit.
Prepare Your Natural Nails
Preparation sets the stage for a set that will last weeks without lifting. First, gently push back the cuticles and remove dead skin around the nail plate. Clean nails thoroughly with isopropyl alcohol or a nail cleanser to remove oils and debris that could interfere with adhesion.
Proper application requires the natural nail to be filed short; this will ensure a good fit for the nail tip and will take any undue stress off the natural nail. File your nails to about one millimeter of free edge. Then, buff the nail surface lightly to make a slight texture that aids in bonding.
Select the Right Adhesive
Not all nail glues are created equal, and choosing the right one impacts your final results. Professional-grade adhesives offer superior bonding strength and flexibility that prevent cracking and lifting. Look for glues that cure quickly but allow enough working time for proper positioning.
Apply adhesive sparingly to prevent excess glue from squeezing out during application. Practice with different amounts until you find the perfect balance for consistent results.
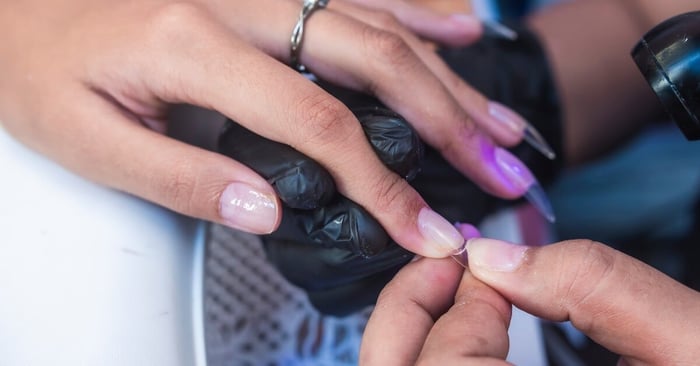
Follow Proper Tip Application Techniques
Positioning tips correctly will give your finished extensions the most natural look. Hold the tip at a 45-degree angle, slowly lowering it onto the natural nail. Press firmly for 10 to 15 seconds to allow the adhesive to set completely.
Work methodically through each nail rather than rushing through the application process.
Cut Tips to Size
Trimming tips to the desired length requires sharp, high-quality nail clippers designed specifically for cutting tips. Cut conservatively at first, as you can always remove more length but cannot add it back. Leave slightly more length than your final goal to allow for shaping and refinement.
It’s also important to make clean, decisive cuts rather than nibbling at the tips gradually.
Use a 180-grit file to file the tips into the desired shape. Take breaks to assess your progress and check that both hands match symmetrically.
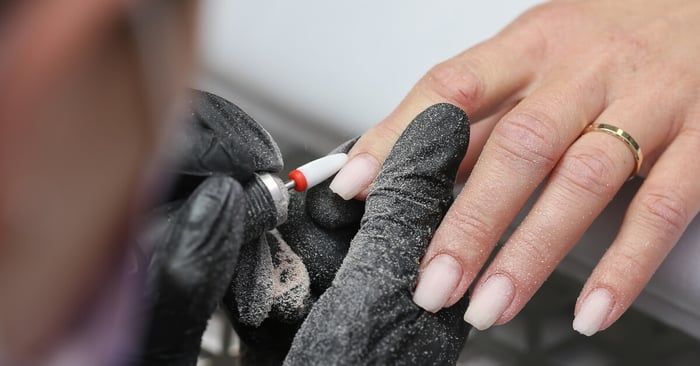
Blend the Seam
Well-less tips don’t need to be blended, but full-well and partial-well tips do in order to remove the line where the tip sits on the natural nail. Use a medium-grit file to gently smooth the tip until it lies flush with the natural nail. Work patiently to avoid over-filing the natural nail. It’s a good idea to thin the tip with a file before gluing it to the nail in order to cut down on the amount of filing on the natural nail after.
Finally, use a buffer to refine the blend after eliminating the prominent ridge until the surface feels completely smooth using care not to over-file the natural nail.
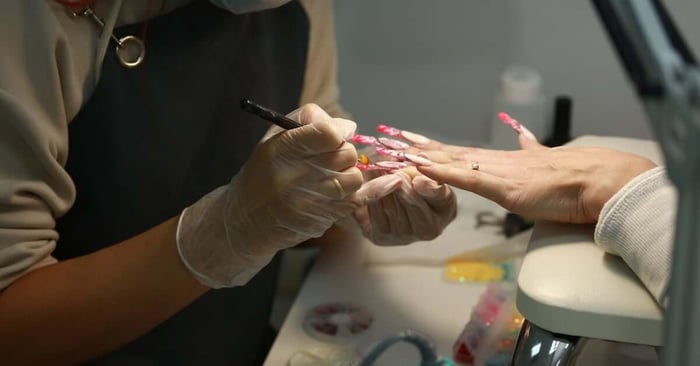
Applying Enhancements
Before applying base coat, cleanse the nail again, as oils and debris can be transferred to the nail plate during the tip application and filing process. Next apply a primer and bonder, but be sure to apply them to the natural nail only as they can damage the plastic tip. Now you can go in with your acrylic or hard gel product to add structure to the nail. Make sure to add an additional bead of product to the stress area at the center or the nail to create strength and support for the tips.
Maintenance and Longevity
With proper application, your tip overlays should last two to three weeks. Apply cuticle oil daily to maintain nail health and prevent lifting around the edges. Wear gloves during cleaning and gardening to protect your nails from damage and excessive exposure to moisture.
Avoid using your nails as tools, which can cause chips, cracks, or complete tip loss. With proper care and quality application techniques, your nail tips will provide weeks of beautiful, natural-looking extensions.